A Langley homeowner called us in March about the stone on her 2011 house. White crust along the bottom course, two stones on the driveway beside the garage door, a dark band a foot high that never dried. She had talked to the manufacturer and was sure the product was defective.
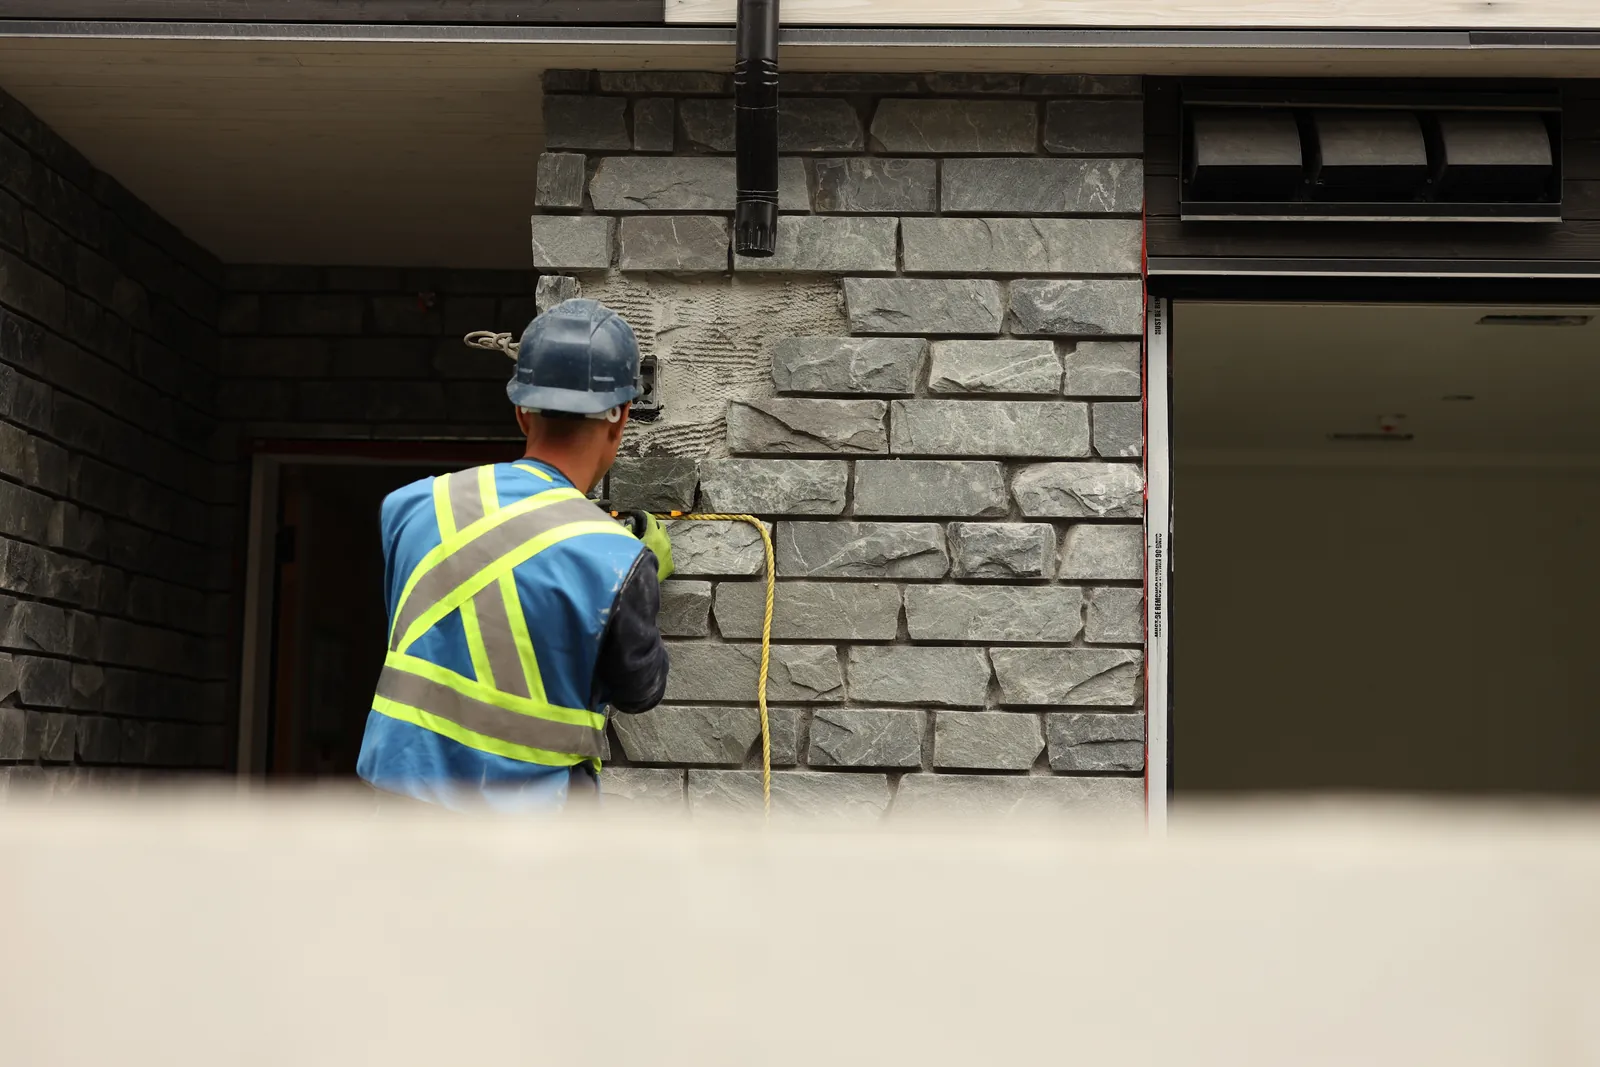
We pulled three stones and a strip of lath. The stone was fine. Behind it: one layer of building paper, no weep screed, the bottom course 40 mm below the top of the pavers. The sheathing at the base took a screwdriver to the handle.
Stone veneer failure in BC follows that pattern. In more than ten years of opening these walls across the Lower Mainland and Vancouver Island, we have replaced stone that failed on its own merits perhaps a handful of times. We have replaced walls that failed because water got behind the stone and could not get out more times than we can count. It is almost always the drainage.
Why does stone veneer fail in BC?
Stone veneer fails in BC when water that gets behind the stone has no drained path back out. Adhered veneer is a reservoir cladding: the mortar bed and the stone itself soak up rain, and coastal BC delivers 1,150 to 2,500 mm of it a year. Without a drainage cavity, a weep screed at the base and properly lapped flashings, that water sits against the sheathing until it rots. The stone is rarely the problem.
Three products called stone veneer, one drainage problem
The phrase covers three different walls, and they do not fail the same way.
Adhered manufactured stone veneer is the one on most houses and townhouses built in the Lower Mainland since about 2000. It is lightweight concrete cast in moulds and coloured to look like ledgestone or fieldstone, 40 to 60 mm thick, stuck to a scratch coat over metal lath with a mortar setting bed. Thin natural stone veneer is real quarried stone sawn to 20 to 40 mm and installed the same way. Both are adhered systems. Both sit on the wall the way stucco does.
Full-bed natural stone is a different animal. It is 90 to 150 mm thick, sits on a foundation ledge or a steel angle, and is tied back to the structure with anchors. It has an air space behind it because the anchors make one. It weeps at the base because that is how anchored masonry has been built for a century. We see full-bed stone with mortar problems and with rusted ties. We almost never see it rot the wall behind it.
The adhered systems are where the drainage gets skipped, because the wall looks like a stucco wall and often gets built by whoever was available that week. In 2026 in Metro Vancouver, adhered manufactured stone installs at $22 to $36 per square foot, thin natural veneer at $40 to $70, and full-bed natural stone from $60 to $120 and up. We compared the products themselves in cultured stone versus real stone. This article is about the part of the wall you cannot see, which is where the money either gets spent or gets saved.
What a drained stone veneer wall looks like behind the stone
Start at the sheathing and work out.
The first layer is a water-resistive barrier, lapped shingle fashion so every seam sheds down and out. Over that goes the drainage layer: a rainscreen mat or strapping that holds the cladding at least 10 mm off the barrier and leaves an open, vented path from the top of the wall to the bottom. The BC Building Code, in the Part 9 wall requirements at 9.27.2.2, calls for that capillary break wherever the Moisture Index is 0.9 or higher. Every municipality in Metro Vancouver, the Fraser Valley and the coastal side of Vancouver Island is above that line, most of them well above.
Over the drainage layer goes a second layer of barrier. This one is a bond break. Without it the scratch coat keys into the drainage mat and the cavity fills with mortar, which is the same as not having one. Then galvanized lath fastened through to the studs, a scratch coat, the setting bed and the stone.
At the bottom of the wall is the piece that matters most: a weep screed. It is a bent metal flashing with perforations or a drip lip that lets the cavity drain and stops the scratch coat from touching the ground. The manufacturers' installation guides and CSA A371 want the screed a minimum of 100 mm above finished soil and 50 mm above paved surfaces. At the top of every wall, half-wall, column and pilaster there is a metal cap flashing under the cap stone, with a drip edge. At every window there is a head flashing with end dams, lapped into the barrier. Where a roof meets the wall there is a kick-out flashing, and the stone stops 50 mm above the shingles.
All of that, the second barrier layer, the drainage mat, the weep screed, the cap and head flashings, costs $4 to $7 per square foot of the $22 to $36. On a 400 square foot front elevation it is $1,600 to $2,800. That is the number that gets cut when a bid comes in low, and it is the number that decides whether the wall lasts 8 years or 50.
The five places drainage gets skipped
We open walls for a living, so this is not a theory list. It is what we find, and it is almost always one of these.
The bottom of the wall is buried. The installer runs the stone down to grade, or the landscaper who came later raises the grade with pavers or planting beds and buries the bottom 100 mm. Soil and pavers hold water against the stone. Efflorescence and spalling show up in the first 300 mm within two or three winters. The Langley house had this and the next two.
There is no weep screed. Sometimes there is nothing at all and the scratch coat runs to the footing. Sometimes there is a stucco J-trim with no weep holes, packed solid with mortar. Either way the cavity, if there is one, has no outlet. Water that gets in stays in.
There is one layer of building paper and no cavity. The scratch coat bonds directly to the paper. Water wicks along the paper laps and finds every reverse lap at a window. On a face-sealed wall like this, the paper is doing the job of a rainscreen with none of the geometry that makes a rainscreen work. This is the same wall that failed across Vancouver in the 1990s under stucco, with heavier cladding on it.
Caps and sills are missing their flashing. Flat-topped entry columns, pilasters beside the garage, half-walls along a front step: these get a cap stone bedded in mortar with nothing under it. Mortar joints on a horizontal surface open in the first freeze. Water goes straight down the core of the column and rots the post inside. On a per-unit basis, columns are the most common stone veneer failure we repair in BC, and they are rarely more than 24 inches square.
Roof-to-wall and deck connections are done wrong. Stone run down into the shingles with no kick-out flashing sends every litre off that roof section into the wall. A deck ledger bolted through the veneer with no flashing does the same from the other side.
There is a sixth item that is not a skipped detail but a wrong repair, and it deserves its own paragraph. Sealing the stone makes a wall with no drainage worse. Water still gets in through the mortar joints, the hairline cracks and the caps. The sealer slows the one thing that was helping, which is evaporation back out through the face. We have seen sealer applied as a fix turn a damp wall into a rotten one in three years.
Reading the wall from the sidewalk
You do not need to open a wall to know it is in trouble. You need to know what the signs mean.
White powder or crust along the bottom courses is efflorescence: salts dissolved out of the mortar by water moving through it and left behind when the water evaporates. On its own it is a cosmetic complaint. On a stone wall it is a report that water is passing through the assembly in volume, and it tells you where.
A dark band that stays dark three days after the rain stops is saturation. Stone and mortar that drain dry within a day. Stone sitting over a wet cavity does not.
Rust streaks below the stone are lath. Galvanized lath that stays wet corrodes, and once the lath goes the scratch coat loses its grip and stones start to release. Stones on the ground are the late stage of that failure. A hollow sound when you knock on a section is the middle stage.
Stepped cracks in the mortar joints, running diagonally from a corner, usually mean the sheathing or framing behind has moved because it is soft. Inside the house, the garage is the place to look: swollen baseboard on the wall that has stone outside, or the bottom of the door jamb going soft.
In coastal BC the timeline is fairly consistent. On an exposed south or west elevation with no drainage, the first signs show at year 5 to 8. On a sheltered north wall under a wide soffit it can take 10 to 15. In the Fraser Valley and the Sea-to-Sky, where a wall sees 30 to 40 freeze-thaw cycles a winter against 10 to 20 on the coast, spalled stone faces show up sooner than the rot behind them does.
What the repair actually costs in 2026
These are our numbers from signed contracts in the Lower Mainland and on Vancouver Island this year. They are for adhered systems, which is where the failures are.
Diagnostics come first. A moisture probe survey and the removal and replacement of three or four stones in the worst-looking spots runs $600 to $1,200, and we credit it against the repair. Do not budget a stone veneer repair without opening the wall. Guessing gets expensive in both directions.
Base-course remediation is the common repair. We cut out the bottom 400 to 600 mm of stone around the affected walls, remove the scratch coat and lath, replace any sheathing that has gone soft, retrofit a weep screed and a new lapped barrier, then re-stone with matched product. In 2026 that runs $190 to $340 per linear foot of wall. A two-car garage front with an entry, about 45 linear feet, comes to $9,000 to $15,000. Where the grade has to come down as well, add landscaping.
A column or pilaster rebuild, with the post inspected or replaced, new barrier, cap flashing under a new cap stone and stone re-set, is $2,400 to $4,800 each. Most houses have two to four.
Full tear-off and re-clad is the end of the road. When the sheathing is gone above the bottom courses, the lath has rusted through in the field of the wall, or more than about a third of an elevation is affected, patching stops making sense. Re-cladding adhered manufactured stone with a complete drainage assembly runs $48 to $75 per square foot. Thin natural stone runs $70 to $110. Sheathing replacement is $9 to $15 per square foot where it is needed, framing repair is by the hour, and anything above one storey needs scaffolding.
The line item that surprises people most is matching. Manufacturers retire colours and profiles every five to seven years. When the stone on a 2011 house is discontinued, we either blend two or three current products to get close, which works on rubble patterns and rarely works on ledgestone, or we re-clad the whole elevation so the change lands on a corner. The second option costs more. It is also the one we recommend more often, because a patch you can see from the street is a defect you paid for.
Set those repair numbers beside the $1,600 to $2,800 that the drainage assembly would have cost on the day the house was built.
Repair the drainage or replace the stone
The decision comes down to what we find behind the bottom courses, and we can usually make it on the day of the test openings.
Keep the stone and fix the drainage when the sheathing above 600 mm is dry and sound, the stone in the field of the wall is well bonded, the lath above the base is still bright, and the product is either still available or the affected area is a full elevation that can be re-clad as a unit. This describes most houses under 15 years old that we look at, and the failure is almost always confined to the bottom course and the columns. The fix is the base course, the caps and any missing head or kick-out flashings, and the stone above stays.
Tear off and re-clad when the sheathing is soft above the bottom course, the lath is rusted through in the field, framing is wet, or the affected area passes about 30 percent of the elevation. At that point the stone that looks fine is bonded to a scratch coat that is bonded to nothing, and it will follow the rest within a few years.
For a strata this becomes a per-unit question. Townhouse complexes built between about 2004 and 2014 across Surrey, Langley, Coquitlam and Maple Ridge very often have adhered manufactured stone at every garage front and entry, installed by the same crew to the same detail. If one unit has it, they all have it. Depreciation reports tend to file this under cladding without a separate line, so councils are surprised twice: once when the first stones drop and again when the number is multiplied by 40 units. Our advice is two test openings on the worst-exposed units before anyone writes a budget, then a per-unit price for the base-course repair, then a schedule that gets the sheathing dry before the next atmospheric river season rather than after it. Our building envelope crews run these as phased programs so the complex is not surrounded by scaffolding all at once.
The BC climate part nobody prices in
Vancouver sees about 1,150 mm of rain a year. The North Shore municipalities pass 2,000 mm. Abbotsford is around 1,500. Victoria is drier at 600 to 900, and gets it as wind-driven rain off the Strait that hits the wall sideways. What matters to a stone wall is not the annual total so much as wetting hours: how many hours a year the face of the wall is wet. On the coast that number is among the highest in North America, which is why the code draws the rainscreen line where it does.
A reservoir cladding in that climate is never fully dry from October to April. Mortar and manufactured stone absorb water readily, natural stone less so depending on the type, and all of it releases that water slowly. Where there is a drained cavity, the water that gets past the stone runs down the barrier and out the weep screed the same day. Where there is not, it wets the sheathing and stays. Oriented strand board sheathing, which is what most houses of this era have, starts to lose strength after a season of that and turns to mulch after three or four.
Freeze-thaw finishes what saturation starts. Water in a saturated stone face expands about 9 percent when it freezes. On the coast that happens ten or twenty times a winter. In Chilliwack or Squamish it happens forty. Each cycle opens the pores a little further, the face spalls, the joint cracks, and the wall takes on more water than it did the winter before. The white powder is the early warning. The stones on the driveway are the end of it.
Most of this was learned the hard way in the 1990s, when face-sealed stucco on Vancouver condos failed on a scale that produced a provincial inquiry and the drained-cavity requirements that have been in the code since. Adhered stone veneer over one layer of paper with no cavity is that wall again. The cladding is heavier and the failure is slower, but the physics has not changed. The flashing details are the same ones we covered in window and door flashing for BC wall assemblies, and the same crews who skip one usually skip the other.
What we recommend
On any adhered stone veneer installed in coastal BC, new or replacement: two layers of water-resistive barrier, a 10 mm drainage mat between them, a weep screed at least 100 mm above soil and 50 mm above hard surfaces, metal cap flashing under every cap stone, head flashings with end dams at every opening, kick-outs at every roof-to-wall, and no stone below the top of the pavers. Get every one of those written into the scope of work as a separate line before you compare bids. A bid that does not name the weep screed has not priced one.
On an existing wall showing staining or efflorescence: open two spots before winter, at the base of the worst elevation and at the base of a column. If the sheathing is dry above 600 mm, fix the base and the caps and keep the stone. If it is wet above that, plan a re-clad of the affected elevations and do it once, with the full drainage assembly, rather than patching the bottom every few years while the rest follows.
Do not seal a stone wall that has no drainage. Fix the drainage. Then decide whether it needs sealing, and it usually does not.
MV Construction has been doing masonry and exterior work across Greater Vancouver and Vancouver Island for more than ten years, on custom homes, strata townhouse complexes and commercial buildings. We are fully licensed, WCB-insured, and our workmanship is warranty-backed. Our estimates are written and fixed-scope, with the drainage assembly, the flashings and the stone priced as separate lines so you can see what you are paying for behind the wall and not just on the face of it. If you are looking at white powder on your stone, or a stone on the ground, talk to a masonry and stone contractor who will open the wall before naming a number. Call (778) 375-5672 or request a fixed-scope estimate, and we will bring the moisture probe.
FAQ
Why is white powder forming on my stone veneer?
The white crust is efflorescence: mineral salts dissolved out of the mortar and stone by water moving through the wall, left on the surface when the water evaporates. It is cosmetic on its own, but on adhered stone veneer in BC it means water is passing through the assembly in volume and usually that it is not draining out at the base. Look for a weep screed and check whether the bottom course is buried in soil or pavers.
How long should stone veneer last in BC?
Properly drained adhered stone veneer, with two barrier layers, a rainscreen cavity, a weep screed and cap flashings, should last 50 years or more in the coastal BC climate. The same stone installed over a single layer of building paper with no drainage typically shows staining and efflorescence at year 5 to 8 on exposed elevations and needs base-course repair or re-cladding within 15.
Can stone veneer be installed without a weep screed?
Not on a wood-frame wall in coastal BC. The BC Building Code requires a drained and vented capillary break behind cladding wherever the Moisture Index is 0.9 or higher, which covers all of Metro Vancouver, the Fraser Valley and the coastal side of Vancouver Island, and a drained cavity needs an outlet. Manufacturer installation guides and CSA A371 call for a weep screed set at least 100 mm above soil and 50 mm above paved surfaces.
Does sealing stone veneer stop water damage?
No. Sealer reduces the water absorbed through the face of the stone, but water still enters through mortar joints, cracks and unflashed caps. On a wall with no drainage, sealer slows evaporation back out and can make the sheathing wetter, not drier. Fix the drainage first. On a properly drained wall, sealing is optional and mostly cosmetic.
How much does it cost to fix failing stone veneer in Vancouver?
In 2026, base-course remediation, which cuts out the bottom 400 to 600 mm of stone, replaces soft sheathing, retrofits a weep screed and new barrier and re-stones with matched product, runs $190 to $340 per linear foot of wall in Metro Vancouver. A column rebuild with cap flashing is $2,400 to $4,800. A full tear-off and re-clad with a complete drainage assembly is $48 to $75 per square foot for manufactured stone and $70 to $110 for thin natural stone, plus sheathing replacement and scaffolding where needed.